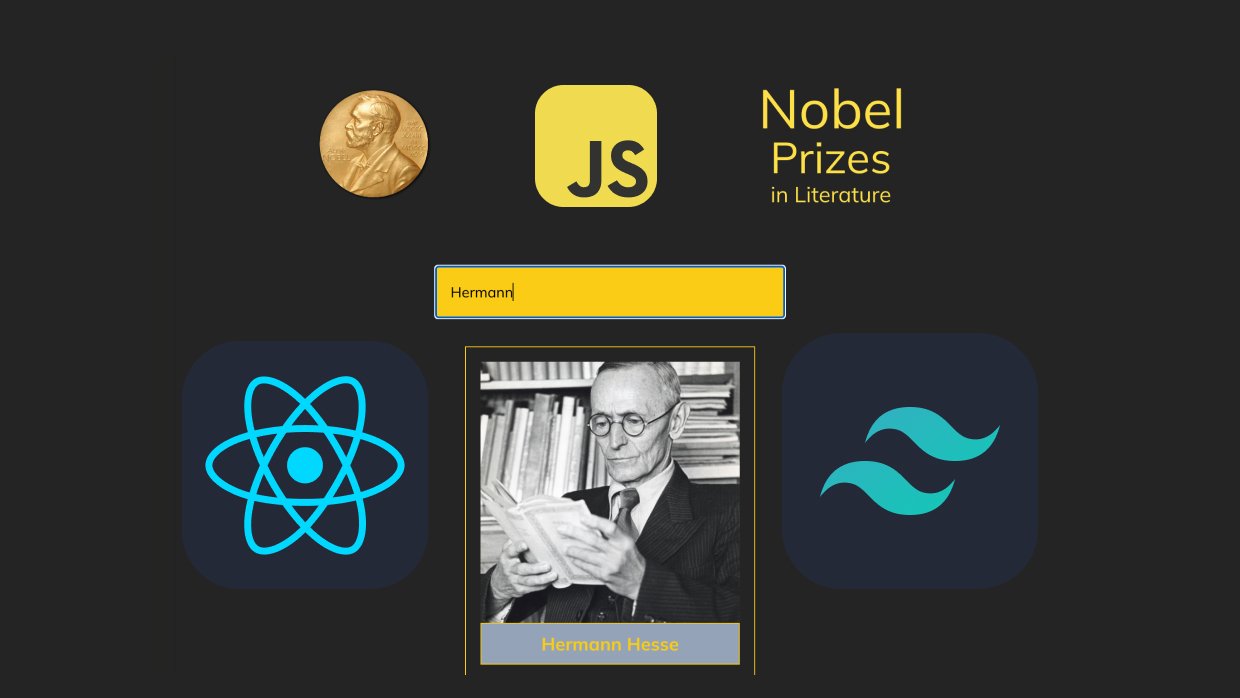
Setup:
Vite Setup
We will set up our project with Vite. For this, we write the following command
npm create vite@latestAfter writing this, we are asked what the project name will be in the terminal; our project name is "nobel-pen".
Then we write in which environment we will set it up: React project and JavaScript+SWC.
cd nobel-pen
  npm install
  npm run dev
We enter our project, install npm and run it.
Github Repo: https://github.com/sanscodex/nobel-pen/tree/c2120b98e2413d3d4a90f4b5aa1e70c0eb485d96
Tailwind CSS Setup
Since we have created our project, we only install dependencies in the Tailwind setup.
npm install -D tailwindcss postcss autoprefixer
npx tailwindcss init -p
Install tailwindcss and its dependencies, then create your tailwind.config.js and postcss.config.js files.
Add the paths to all of your template files in your tailwind.config.js file.
/** @type {import('tailwindcss').Config} */
export default {
  content: ["./index.html", "./src/**/*.{js,ts,jsx,tsx}"],
  theme: {
    extend: {},
  },
  plugins: [],
};
Add the @tailwind directives for each Tailwind layer to your ./src/index.css file.
@tailwind base;
@tailwind components;
@tailwind utilities;
Github Repo: https://github.com/sanscodex/nobel-pen/tree/4253ba50493200aefeb239aca138e7dca7b3c47a
Mock Data
We added mock data of Nobel Prize-winning authors in literature, let's show one of the authors as an example.
{
    id: "241248",
    name: "Orhan Pamuk",
    year: "2006",
    imageUrl:
      "https://commons.wikimedia.org/wiki/Special:FilePath/Orhan%20Pamuk%202009%20Shankbone.jpg",
    wiki: "https://en.wikipedia.org/wiki/Orhan_Pamuk",
    countries: "Turkey",
    notableWorks:
      "The Museum of Innocence, The New Life, The Black Book, My Name Is Red, Istanbul: Memories and the City, Cevdet Bey and His Sons, Snow, The White Castle, Nights of Plague",
  },
Github Repo: https://github.com/sanscodex/nobel-pen/tree/c43517945c47d6dc1c4121458e605015250eab1c
Preparing the Project Skeleton
First, we will create our components under src; our first component is Header.
import Logo from "../assets/nobel-prize-logo.png";
const Header = () => {
  return (
    <div className="flex justify-around items-center mt-16">
      <img src={Logo} alt="logo" className="w-32"></img>
      <h1 className="text-center text-2xl w-40 text-yellow-300">
        <span className="text-6xl">Nobel</span>{" "}
        <span className="text-5xl">Prizes</span> in Literature
      </h1>
    </div>
  );
};

export default Header;
Here we write a header with our logo and title. I put the Logo in assets under src and when calling it, we call it with import and write the image extension. We send this Header Component to App.jsx.
We also write the Search component and import it into App.jsx.
const Search = () => {
  return (
    <div className="flex justify-center mt-16">
      <input
        type="text"
        placeholder="Search Author"
        className="w-96 p-4 bg-yellow-400 text-black"
      />
    </div>
  );
};

export default Search;
Let's start writing Authors.jsx where we will pull the award-winning authors from the data.
Since data is named export, we cannot import it by changing the name. We can only import it as it was written.
import { data } from "../helpers/data";

const Authors = () => {
  console.log(data);
  return (
    <div className="authors-container">
      <div className="author-card">
        <div className="author-image">
          <img src="#" alt="author-name" />
        </div>
        <div className="author-info">
          <p>Author Name</p>
          <p>Notable Books</p>
          <p>Nobel's year</p>
          <p>Author's Country</p>
          <button>Read More in Wiki</button>
        </div>
      </div>
    </div>
  );
};

export default Authors;
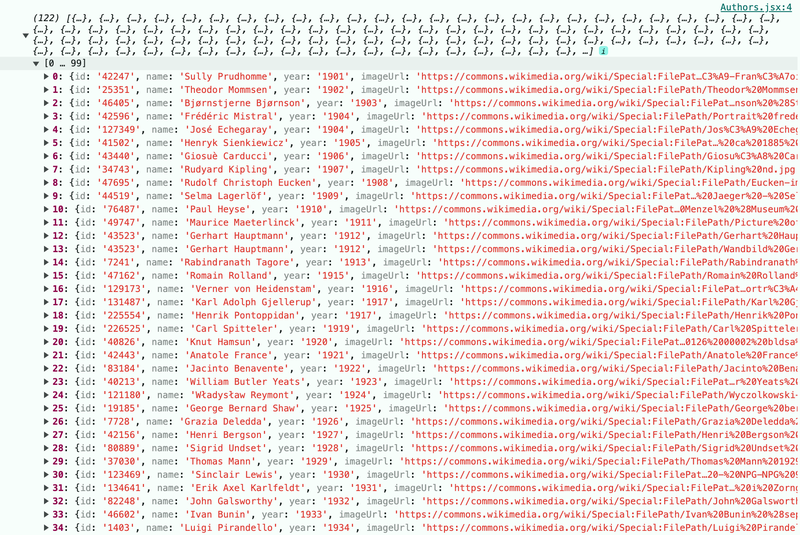
At first, I show the authors with cards like this. Also, we can see all our data in the console as follows.

Logical Parts of the Project
Let's add some style with Tailwind. I map the authors, create a new card for each incoming data and place the incoming data as parameters in the relevant places on the cards. And let's use useState with a ternary operator. When the image cards are clicked, the information about the author should be displayed.
import { data } from "../helpers/data";
import { useState } from "react";
const Authors = () => {
  console.log(data);
  const [show, setShow] = useState(false);
  return (
    <div className="authors-container flex flex-row flex-wrap justify-center items-center gap-16 m-8">
      {data.map((authorItem) => {
        return (
          <div
            onClick={() => {
              setShow(!show);
            }}
            key={authorItem.id}
            className="author-card flex border w-80 border-yellow-400 p-4 gap-4"
          >
            {!show ? (
              <div className="author-image w-72  overflow-hidden  bg-slate-400 ">
                <img
                  className="object-cover h-72 w-full"
                  src={authorItem.imageUrl}
                  alt={authorItem.name}
                />
                <a className="border border-yellow-400 p-2 block text-yellow-400 font-bold text-xl  text-center">
                  {authorItem.name}
                </a>
              </div>
            ) : (
              <div className="author-info flex flex-col  w-full  gap-8">
                <p>{authorItem.name}</p>
                <p>{authorItem.notableWorks}</p>
                <p>{authorItem.year}</p>
                <p>{authorItem.countries}</p>
                <a
                  href={authorItem.wiki}
                  className="p-2 w-32 bg-yellow-400  text-slate-800"
                >
                  Read More
                </a>
              </div>
            )}
          </div>
        );
      })}
    </div>
  );
};

export default Authors;
Here in the ternary, we said if the state is false, convert it to true with the not operator and print the image to the screen. Otherwise, print the author information to the screen. Since the initial value of the first state is false, images come to the screen. We did this for each element in the map. When the card is clicked, the onClick function comes into play, updating the setShow state to be the opposite of the show state.
GitHub Repo: https://github.com/sanscodex/nobel-pen/tree/0f0c71c552fb3049c7b8e1d02ab5a2e3c5a473e1
Now here, when you click on the card, all cards change. We need to change only the relevant clicked card and show its information. The problem here is that there is only 1 state tracking the change; that is, when one changes, all Cards change. But I have 122 different cards. So we need a separate state for each card. Let's make the part where the author information is seen a different component and use useState there. Thus, there will be a separate click state for each. Virtual DOM understands the difference and updates only the component that has changed. Therefore, we create a separate component, for each author.
import { useState } from "react";
const Author = ({ authorItem }) => {
  const [show, setShow] = useState(false);
  return (
    <>
      <div
        key={authorItem.id}
        onClick={() => {
          setShow(!show);
        }}
        className="author-card flex border w-80 border-yellow-400 p-4 gap-4"
      >
        {!show ? (
          <div className="author-image w-72  overflow-hidden  bg-slate-400 ">
            <img
              className="object-cover h-72 w-full"
              src={authorItem.imageUrl}
              alt={authorItem.name}
            />
            <a className="border border-yellow-400 p-2 block text-yellow-400 font-bold text-xl  text-center">
              {authorItem.name}
            </a>
          </div>
        ) : (
          <div className="author-info flex flex-col  w-full  gap-8">
            <p>{authorItem.name}</p>
            <p>{authorItem.notableWorks}</p>
            <p>{authorItem.year}</p>
            <p>{authorItem.countries}</p>
            <a
              href={authorItem.wiki}
              className="p-2 w-32 bg-yellow-400  text-slate-800"
            >
              Read More
            </a>
          </div>
        )}
      </div>
    </>
  );
};

export default Author;
Here we use useState for a single author. Thus, when we click on the card, it opens and the author information becomes visible.
import { data } from "../helpers/data";
import { useState } from "react";
import Author from "./Author";

const Authors = () => {
  console.log(data);

  return (
    <div className="authors-container flex flex-row flex-wrap justify-center items-center gap-16 m-8">
      {data.map((authorItem) => (
        <Author key={authorItem.id} authorItem={authorItem} />
      ))}
    </div>
  );
};

export default Authors;
Here we write each Author Card component separately by mapping it.
GitHub Repo: https://github.com/sanscodex/nobel-pen/tree/fd3af82559f85ea42d889569bd720c0f53fce6d8
Now I need to apply a filter to the search button.
We called all of them separately in App.jsx in our file hierarchy, so I will define useState at the top in App.jsx. Here I will make the handleChange change. I will send these changes down as props.
import Authors from "./components/Authors";
import Header from "./components/Header";
import Search from "./components/Search";
import { useState } from "react";

export default function App() {
  const [search, setSearch] = useState("");

  const handleChange = (e) => {
    setSearch(e.target.value);
  };

  return (
    <div>
      <Header />
      <Search handleChange={handleChange} />
      <Authors search={search} />
    </div>
  );
}
import Authors from "./components/Authors";
import Header from "./components/Header";
import Search from "./components/Search";
import { useState } from "react";These lines import the necessary components and React's useState hook.
export default function App() {This defines the Main App component.
const [search, setSearch] = useState("");Here, a state is created for the search term. The initial value is an empty string.
const handleChange = (e) => {
  setSearch(e.target.value);
};
This function catches changes in the search input and updates the search state.
return (
  <div>
    <Header />
    <Search handleChange={handleChange} >
    <Authors search={search} >
  </div>
);
This part defines the structure of the component to be rendered. It contains Header, Search and Authors components. The handleChange function is passed to the Search component and the search state is passed as a prop to the Authors component.
This structure manages the search functionality at the top level (in the App component) and passes the necessary data and functions to the child components as props. This is in line with React's “top-down data flow” principle.
import { useState } from "react";

const Search = (props) => {
  return (
    <div className="flex justify-center mt-16">
      <input
        type="text"
        placeholder="Search Author"
        className="w-96 p-4 bg-yellow-400 text-black"
        onChange={props.handleChange}
      />
    </div>
  );
};

export default Search;
This code fragment defines a search component built using React.
const Search = (props) => { ... }It defines a function component called Search. This component takes a parameter called props.
- The component returns a <div> element:
- There is an <input/> element inside the <div>:
- onChange={props.handleChange} - Specifies the function to be called when the value of the input changes. This function is passed from the parent component via props.
- export default Search; - Exports the Search component so it can be imported in other files.
This component creates an input field where the user can search for authors. When the user types something in this field, the handleChange function from the parent component will be called and the search will be performed.
import { data } from "../helpers/data";
import Author from "./Author";

const Authors = (props) => {

  console.log(data);
  const filteredData = data.filter((item) =>
    item.name.toLowerCase().includes(props.search.toLowerCase())
  );
  return (
    <div className="authors-container flex flex-row flex-wrap justify-center items-center gap-16 m-8">
      {filteredData.map((authorItem, index) => (
        <Author key={index} authorItem={authorItem} />
      ))}
    </div>
  );
};

export default Authors;- First, the necessary modules and components are imported:
import { data } from "../helpers/data";
import Author from "./Author";- Defining a function component called Authors:
const Authors = (props) => {
  // ...
};- Create a variable called filteredData. This variable filters the data array:
const filteredData = data.filter((item) =>
  item.name.toLowerCase().includes(props.search.toLowerCase())
);
This filtering selects author names that contain the props.search value (the search term entered by the user). This changes the search in useState every time there is a change in Search.jsx in handleChange from App.jsx above and sends it as Authors.jsx props. ToLowerCase() is used to remove case sensitivity.
- The filteredData array is looped with the map() function:
{filteredData.map((authorItem, index) => (
  <Author key={index} authorItem={authorItem} />
))}
This loop creates an Author component for each filtered author. Each Author component is passed the corresponding author data as authorItem prop. index is used as the key prop.
- Finally, the Authors component is exported:
export default Authors;This script creates a list of authors with search functionality. When the user enters a search term, the list is dynamically filtered and shows only authors that match the search term.
Github Repo: https://github.com/sanscodex/nobel-pen/tree/abb5a450238340fc25408486abaeb861196f274b
React features used in this project: Project setup with Vite, function components, useState hook, props, list rendering with map function and conditional rendering (using ternary operator).
— Github Repo
— Demo


Leave a reply